
If you’re looking for an alternative to Aquablox, there are plenty of options that can be used inside your pond.
The first option is a rock barrier. Rocks work well because they are porous and help with aeration. You will need to find rocks that fit the size of your pond in order for it to be successful.
Next, we have clay balls or bricks which also serve as a good filter and help maintain water quality levels within the pond.
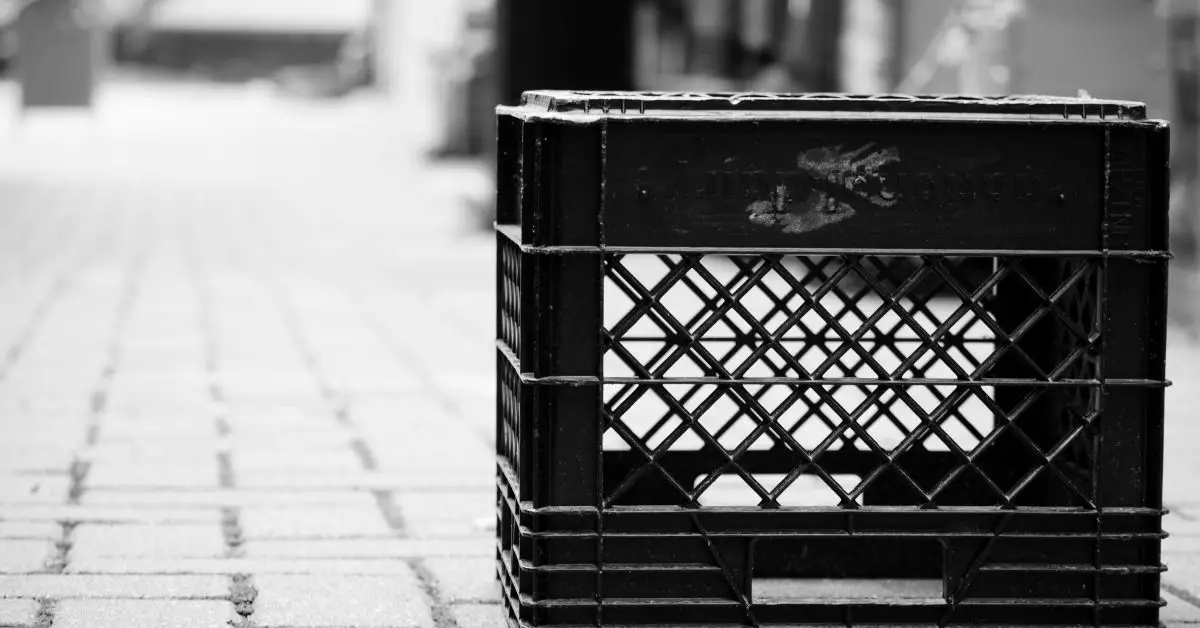
Another option is plastic milk crates, which are very cheap and can be found at most local grocery stores. They work by floating in the water and creating a barrier that separates fish waste from the rest of the pond.
Finally, if you don’t want anything too permanent then mesh netting might be just what you’re looking for. Mesh netting is easily installed on top of your existing liner and provides excellent protection from leaves and other debris during fall clean-up time.


Cutter Backyard Bug Control Spray Concentrate (2 Pack), Kills Mosquitoes, Fleas & Listed Ants, 32 fl Ounce
35% Off


LIANGLOME Solar Fence Lights Outdoor - 2700/4000/6000K 3 Mode, Waterproof LED, Fence Light Solar Powered for Outside, Backyard/Railing/Step/Patio/Wall and Home Improvement(8 Pack)
16% Off


GOOTOP Bug Zapper Outdoor, Mosquito Zapper, 3 Prong Plug in Electric Fly Zapper, Mosquito Killer, Fly Traps, Flying Insects Zapper Indoor Outdoor 90-130V, 4200V, ABS Plastic Outer (Black)
33% OffWhat is Aquablox (Aqua blocks) and what is its purpose?
Aquablox are small plastic blocks that you can use inside your pond to help with filtration and aeration. These blocks come in a variety of shapes, sizes, and colors. They’re easy to install once you are know how.
Aquablox is a popular product that many pond owners use it also to block their fish from jumping out of the pond.
What are the differences between AquaBlox and a milk crate in a pond?
- AquaBlox are specifically engineered for in-ground water storage management. It is designed to handle much greater load-bearing weights than milk crates.
- AquaBlox’s dimensions (outside) are also engineered to work with AquaBlock’s filter so you can easily and cost-effectively maintain your Waterfall Vault filter.
- The AquaBlox system is more resilient to various weather conditions, milk crates are made of plastic which breaks down over time by ultraviolet light (sunlight).
- AquaBlox is a preformed plastic box that has internal reinforcing bulkheads, which are adjustable. The AquaBlox is square and because of how AquaBloxs are made they will not deform when loaded with rocks or weight. AquaBlox prevents heavy objects from sinking into the pond bottom.
- AquaBlox can be installed in any configuration on the AquaBlox grid layout, which allows AquaBlox to be used as a structural component of your pond. AquaBlox can also be used in straight lines, curves, or any other custom configurations.
Can you stack AquaBlox in your pond?
Yes, you can stack AquaBlox together, AquaBlox will fit and stack together in a variety of different configurations. You can split AquaBlox apart and use the pieces separately as well.
How do I install AquaBlox in my pond?
It is very important to follow the installation instructions when installing AquaBlox. Preparation and planning are key to a proper installation.
AquaBlox must be installed with a minimum of 6 inches of water column above the AquaBlox. This will allow for maintenance access, as well as support rocks and other items that are placed on top of AquaBlox.
It is recommended to measure the pond and mark points on either side of the pond where you will install AquaBlox. It is also recommended to use a string line from point to point, this way you can easily remove it if adjustments are needed later.
Mark points for each AquaBlox in relation to the other AquaBlox, use a level to make sure each AquaBlox is flat and even.
Drill holes for the plastic anchors and screws provided with your AquaBlox. Depending on the type of soil you are installing into will determine the size of the anchor you should be using. The correct drill bit size can be found in the installation manual.
Place a small amount of gravel in the bottom of each AquaBlox. This will help keep the AquaBlox from sinking into the soil over time, which could cause structural issues later down the road. Do not use sand as an underlayment for AquaBlox
The AquaBlox must be connected to each other with the plastic straps provided. Screw one end of the strap into an AquaBlox, and then connect that strap to another AquaBlox by placing a washer on both sides of the plastic connector and putting it through the connection hole on each AquaBlox.
Once you have connected all AquaBlox together with the plastic connectors, drill a hole near the edge in each corner of the AquaBlox. This will allow for wire connections to pass through the connectors and prevent any water leakage into the AquaBloxs.
Using a waterproof wire, connect all of the AquaBlox together by running wires down one side and up the other until you reach the last AquaBlox. Make sure you check all AquaBlox and make sure the wires are tight, as well as the AquaBlox connector is locked in place – if not you may have a leak.
Once your AquaBloxs are connected together with wire to create a grid layout, feed the filter cable through one of the holes that you drilled earlier in each corner of the AquaBlox. Once the filter cable is inside, attach a connector to each end and seal any openings by applying silicone if needed.
Once your AquaBlox are connected together and your electrical connections are made – you can now fill with whatever media you choose. (This will depend on what kind of pond filtration you have and what size of media you will need). Check all connections and tighten.
When installing into a pond, AquaBlox must be installed as deep as possible with the top edge even to the surface of the water in your pond. The more water that is covering AquaBlox while being installed, it will help keep them at their base and not floating. Make sure all AquaBlox are level and even with each other.